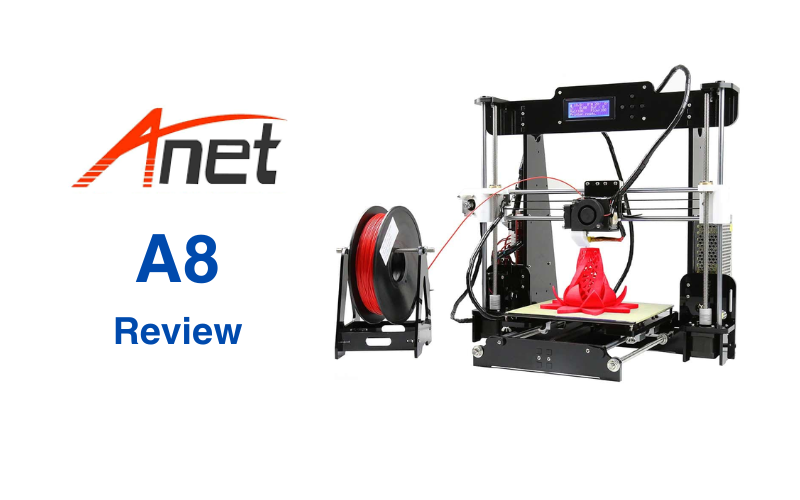
Anet A8 Review
With the 3D printing market brimming with all kinds of choices, you’re sure to find one that’s right for you. But what if you want to build your own? There’s one that’s super cheap—usually under $200—and gives you everything you need to get started with 3D printing. But, as a DIY kit, it’s not exactly plug-and-play. You’ll be doing a lot of the work yourself, from building it to dialing in the settings.
So, how good can a 3D printer this cheap actually be? That’s what we’re here to figure out. In this review, we’ll go through what it’s like to build, use, and upgrade the Anet A8. If you’re curious about getting started with 3D printing without spending a fortune—or if you’re just looking for a fun project—this printer might be exactly what you’re after.
Design
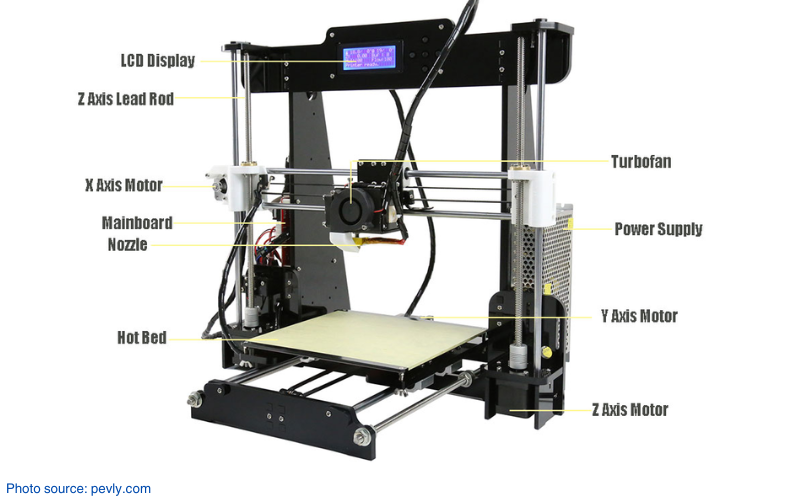
The Anet A8 follows the familiar Prusa i3-inspired framework but distinguishes itself for its affordability and self-assembly. The frame is made from laser-cut acrylic, which helps cut costs but can feel a little flimsy compared to sturdier metal frames. It’s not the toughest printer out there, but for the price, it gets the job done.
Since this is a DIY kit, you’ll be putting everything together yourself. That might sound a bit daunting if you’re new to 3D printing, but the process is pretty straightforward. Between the included instructions and tons of YouTube guides from the community, most people can get it up and running without too much trouble. Sure, it takes some patience, but it’s a great way to learn how everything works.
The A8 gives you a 220mm x 220mm x 240mm heated bed to work with, which is a solid size for most beginner projects. It also has an LCD screen for easy controls, so you don’t need to keep it tethered to a computer all the time.
That said, there are a few downsides. The wiring and power supply are exposed, which isn’t the safest setup, especially if kids are around. If you plan to use it in a classroom or shared space, you’ll probably want to add some enclosures to keep things secure.
Still, the A8’s design has a lot of fans, and the active community around it has created all kinds of mods to improve its performance and safety. If you’re into tinkering, this printer offers plenty of opportunities to make it your own.
Assembly
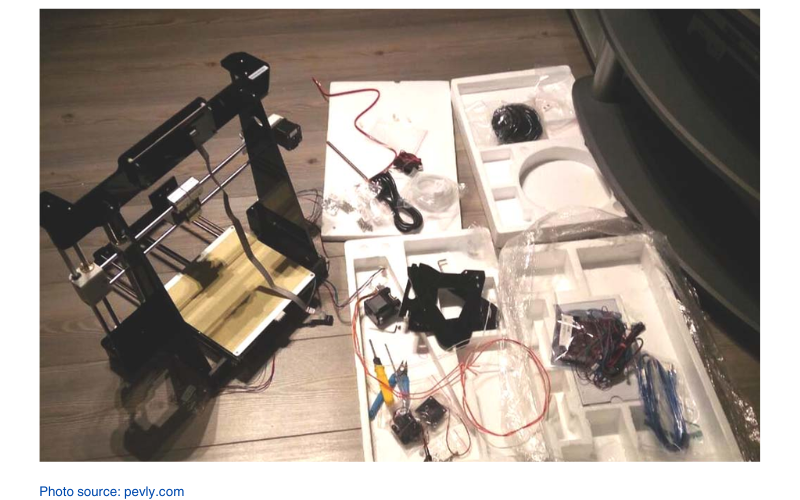
Putting the Anet A8 together is definitely an adventure, especially if it’s your first time building a 3D printer. The kit comes with all the parts you need, but you’ll be doing a lot of the work yourself, from peeling protective film off the acrylic frame pieces to screwing everything into place. It’s a time-consuming process, so don’t expect to have it up and running in an hour—it’s more like a weekend project.
The instructions included in the kit are okay, but they’re not perfect. Thankfully, the Anet A8 has a big online community, and there are plenty of YouTube videos and forums that walk you through every step of the build. Those resources make things a lot easier, especially if you get stuck.
Some parts of the assembly can be a little tricky. The T-joints, for example, are small and fiddly, and you’ll need a steady hand to get everything lined up right. A few holes might not be fully cut out, so you’ll need to carefully punch those through yourself. It’s not a dealbreaker, but it’s something to be aware of before you dive in.
Once the frame is built, wiring everything up is the next big step. The mainboard and PSU connections are pretty barebones, so you’ll want to take your time to make sure everything is secure and safe. Cable management is another thing to keep in mind—things can get messy fast if you’re not careful.
Overall, assembling the A8 is a bit of a test in patience and problem-solving, but it’s also a great way to learn how a 3D printer works. I would say too, if you’re an absolute beginner to 3D printing, this kit might be too overwhelming.
How to Use the 3D Printer
Once you’ve got the Anet A8 assembled, using it is pretty straightforward, especially if you’re familiar with 3D printing basics. If you’re new, don’t worry—the learning curve isn’t too steep, and there are plenty of resources out there to help you get started.
First, you’ll need to download a slicing software like Cura. It’s free and works well with the A8. Setting it up is as easy as selecting “Prusa Mendel I3” from the machine settings, and then you’ll need to tweak a few parameters to get the best results. Then adjust a few key parameters to get started with PLA filament:
- Layer Height: 0.1mm or 0.2mm
- Print Speed: 50mm/sec
- Print Temperature: 190°C
- Bed Temperature: 45°C
- Filament Diameter: 1.75mm
- Flow: 100%
- Nozzle Size: 0.4mm
These settings are critical for good prints, so double-check them before slicing your file. For example, if you skip setting the correct temperatures, you could end up with clogs or poor bed adhesion. Next, there are a few important setup measurements to get right on the printer itself.
- After assembly, turn off the stepper motors and manually adjust the X-axis and Y-axis so there’s 24mm of space on each side. This ensures the print head and bed are centered properly.
- For the Z-axis, you’ll need to carefully position and calibrate the limit switch. Set it up so the nozzle stops just above the bed surface when homing. And then fine-tune it for consistent first layers.
Once you’ve made these adjustments, recheck your leveling to avoid any potential mishaps during printing.
First prints
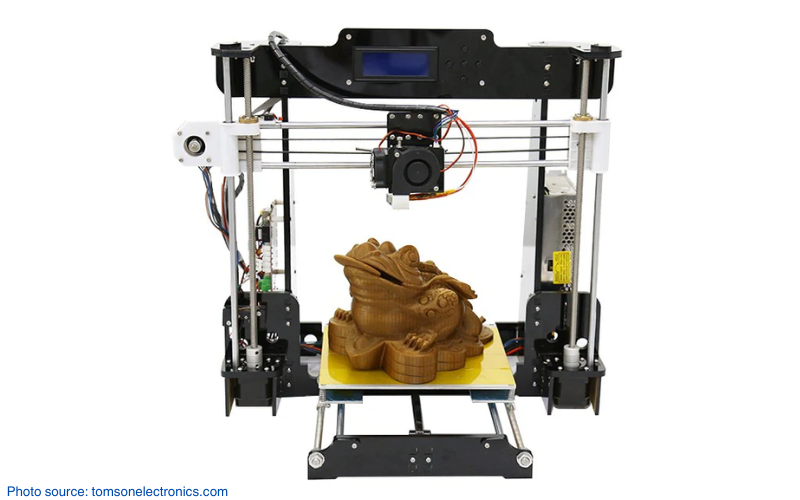
Before jumping into your first big project, it’s a good idea to test the printer with the preloaded files on the included SD card. These example prints are already sliced and ready to go, so you can focus on things like leveling the bed and checking for any issues with the first layer. Once you’re confident everything is working smoothly, you can move on to your own designs.
To find models to print, websites like Thingiverse are a great place to start. Just download a model, slice it in Cura, save the file to your SD card, and you’re ready to go. Insert the card into the printer, use the LCD controls to select the file, and hit print. One thing to note is that the A8’s menu system can feel a bit clunky at first. The buttons aren’t the most intuitive, and it might take a few tries to get used to navigating the settings. But once you’ve got the hang of it, it’s easy enough to use.
The Anet A8 is pretty hands-on, so expect to spend time fine-tuning settings, tightening belts, and making small adjustments. It’s not exactly a “plug and play” printer, but it’s a great tool for learning the ropes and experimenting with 3D printing.
Upgrades You Can Print
One of the coolest things about the Anet A8 is how much you can customize it. The community has come up with tons of printable upgrades to make it safer, easier to use, and even better at printing. If you’re up for a little experimenting, you can turn this budget-friendly kit into something pretty impressive.
Here are some upgrades worth checking out:
- Cable Management Clips: The wiring on the A8 can get messy, but you can print clips to keep everything organized. It’s a quick fix that makes the whole setup look and feel better.
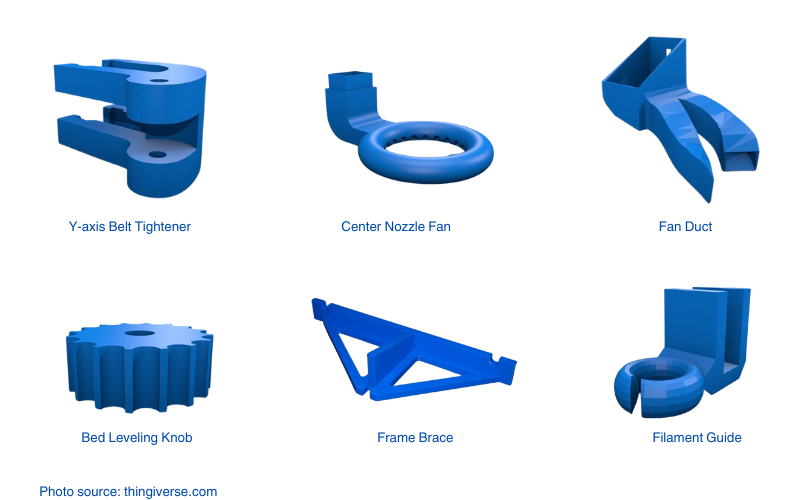
- Y-Axis Belt Tightener: Keeping your belts properly tensioned is important for good print quality. Also, a printed tightener makes it way easier to adjust.
- Center Nozzle Fan: Better cooling can make a big difference, especially with detailed prints. This fan upgrade directs airflow right where it’s needed most.
- Filament Guide: This handy little print keeps your filament feeding smoothly into the extruder and stops it from tangling or snagging.
- Fan Ducts: Upgrading your fan ducts can really help with cooling, especially on overhangs and detailed parts. There are plenty of designs out there to try.
- Bed Leveling Knobs: The stock knobs are small and a pain to use, but bigger, printed ones make leveling the bed so much easier.
- Mainboard and PSU Covers: Since the electronics are pretty exposed, printing covers for the mainboard and power supply is a good idea—especially if you’re using the printer around kids.
- Frame Braces: The acrylic frame works, but it’s not super sturdy. Adding braces can help make everything more stable for better prints.
- Spool Holder: The included spool holder works, but there are tons of better designs you can print. Whether you mount it on the frame or keep it separate, a good spool holder makes filament feeding a lot smoother.
These are just a few ideas to get you started. The Anet A8 community has mods for just about everything, from small tweaks to major overhauls. If you’re the type who likes to tinker, this printer is a goldmine for experimenting and upgrading. Plus, half the fun is seeing how much better you can make it!
Final Thoughts
The Anet A8 is one 3D printer DIY kit that will challenge you and teach you a lot about 3D printing. Sure, it’s not perfect—there are some rough edges, and you’ll need to put in time to assemble it, tune it, and maybe print a few upgrades to get it where you want. But for under $200, it offers a lot of value, especially for anyone who enjoys hands-on projects.
What really stands out about the A8 is its community. The support, tips, and printable upgrades from other users make it a lot easier to navigate any challenges. It’s a printer that rewards patience and a willingness to learn, and for many, that’s part of the appeal.
If you’re looking for an affordable way to start 3D printing and you enjoy tinkering and experimenting, the Anet A8 can be a solid choice. Just be prepared for a bit of a learning curve—and maybe a few late nights—but that’s part of the fun.